tenEcmServer Configuration
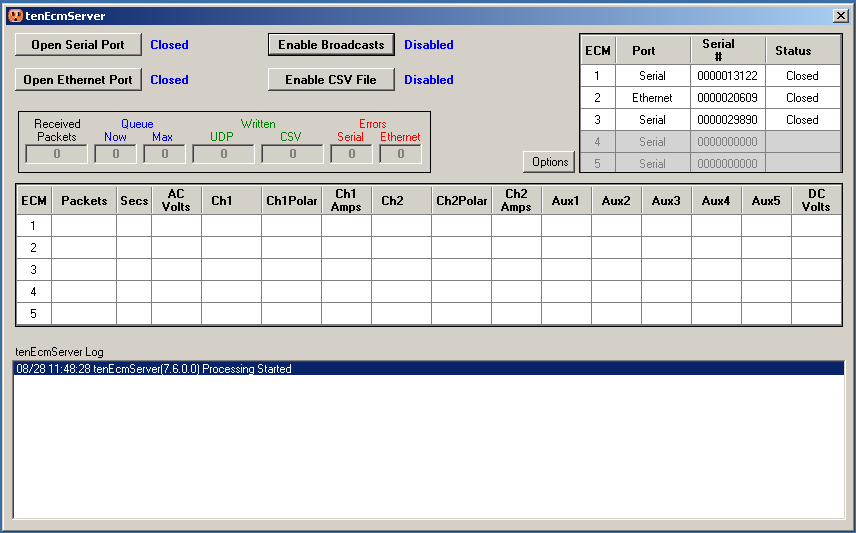
When tenEcmServer is started, it displays the main dialog as shown below:
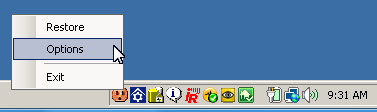
First, open the Options dialog: Click the Options button on the main
screen or right-click the tenEcmserver icon in the
windows notification area and click on Options as per below:
The following Options dialog will be displayed:
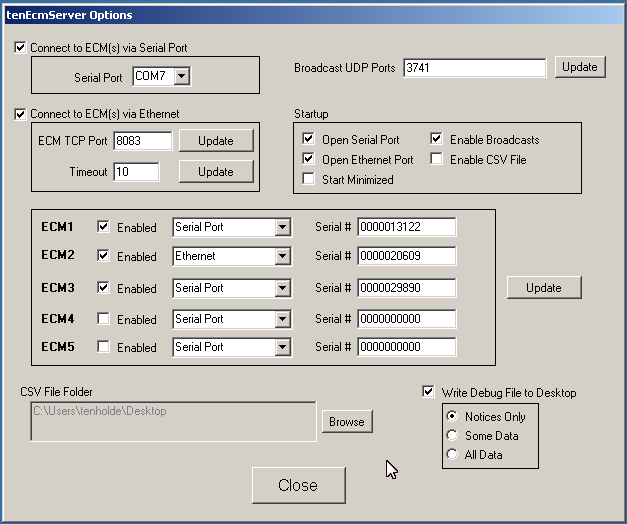
tenEcmServer can connect to five ECMs simultaneously. You can connect
to all of them via the serial port (using a MUX adaptor from Brultech to connect
more than one ECM to the serial port), all of
them via ethernet, or several via each method.
Select Connect to ECM(s) via Serial Port and/or Connect to ECM(s) via
Ethernet. If using the serial port, select the COM port that the ECM(s)
are attached to. If connecting via Ethernet through the EtherBee or
EtherPort, select
the TCP port configured for the EtherBee/EtherPort (usually, 8083). You should have
already run the
EtherBee configuration program that set the TCP port. You also
should have configured the EtherBee with the IP address of the tenEcmServer
computer. You also specify the ethernet connection timeout in seconds.
Specify a number that is at least twice the expected interval between ECM
transmissions.
Now that you have configured the connection methods (serial port and/or ethernet
port) you must configure each ECM. Check the boxes to enable each of the
five ECMs you have connected to tenEcmServer and specify for each which
connection method (serial or ethernet) is used for that ECM. Enter the Serial
Number for each ECM. If you do not know the
serial number, enter any five digit number and you will get an 'unknown ECM
serial number' error message containing the serial number once you open the
communication port(s) and packets are received.
Then enter the UDP Ports (separated by a comma) to be used to broadcast data to
client programs and click the
Update button. In
most cases, only a single UDP port is necessary. Multiple computers can
all receive on this same port simultaneously. In most cases, multiple
programs on the same computer can also receive on the same port simultaneously.
If you find that you are having difficulty running multiple clients on the same
computer using the same port, you can have tenEcmServer broadcast on up
to 3 ports and have each client program listen on a different port.
Although tenEcmServer broadcasts Comma-Separated-Values (CSV) formatted
UDP packets and there is a tenEcmCsvLogger program
that receives these packets and writes them to a flat file, you can also have
tenEcmServer write the CSV records directly to a flat file. You can
change the default folder (but not the file name) in which the records are
written by browsing to the target folder and clicking OK. The file name is
always tenEcmCsvLogger.csv.
You should also check the Write Debug File to Desktop box and select at
least Notices Only.
When you first start tenEcmServer, you must manually enable ECM
communications and packet Broadcasts. In the Startup section of the
Options dialog, you can specify that you want to automatically open the serial or
ethernet ports, start writing CSV records to a file, and minimize
tenEcmServer to the notification area as soon as tenEcmServer is
started. You can then place a shortcut to tenEcmServer in the
windows Start/Programs/Startup folder and automatically run
tenEcmServer unattended.
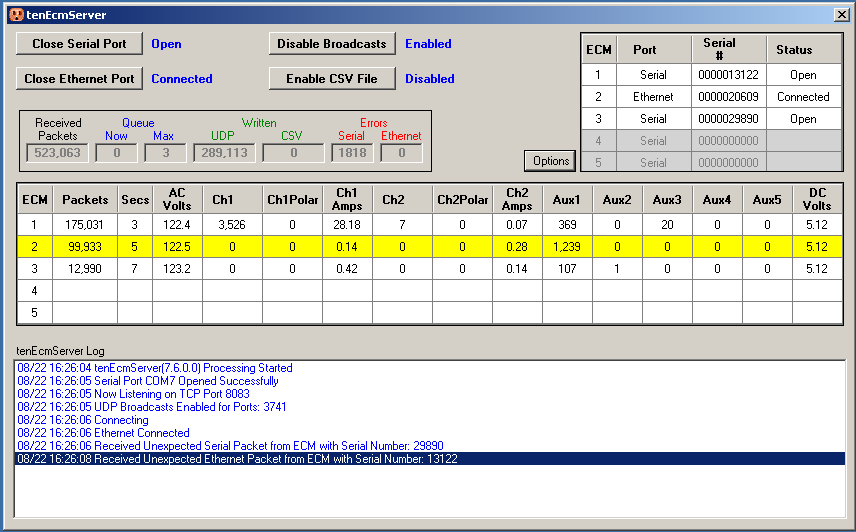
Once you've configured tenEcmServer for proper communications, you first click
the Open Serial Port and/or Open Ethernet Port buttons to start talking to the ECM(s). Then click the
Enable Broadcasts button to start broadcasting UDP packets to all client
programs. You can also click the Enable CSV File button to begin writing
CSV records to a flat file. The image below depicts the dialog while
receiving ECM data from both the serial port and the ethernet port, and broadcasting UDP packets to clients:
You can minimize the window to the Notification Area by clicking the X at
the top-right of the window. Right-click the icon in the Notification Area
to either restore the window to normal size, display the Options dialog, or to close tenEcmServer.